Flat tire! One day when we were about to go out for a ride, we noticed out rear bike tire was completely out of air. After pumping it up and going out for about 15 minutes, it was obvious we were going to have to turn around and head back home.
We didn't get the "before" picture of the flat tire. Here's the bike already flipped over and wheel removed. My friend doesn't remember doing this before so fun adventure awaits!
Click on the "Read more" below to see if we figured this mess out.
There is a tube inside the tire that fills with the air. This is the part we have to replace. It's got some numbers on it, so I'm sure we can match that to something in the store, right?
Here's the tire off the rim. It wasn't hard to get it off but we were a little worried it might not be easy to get back on.
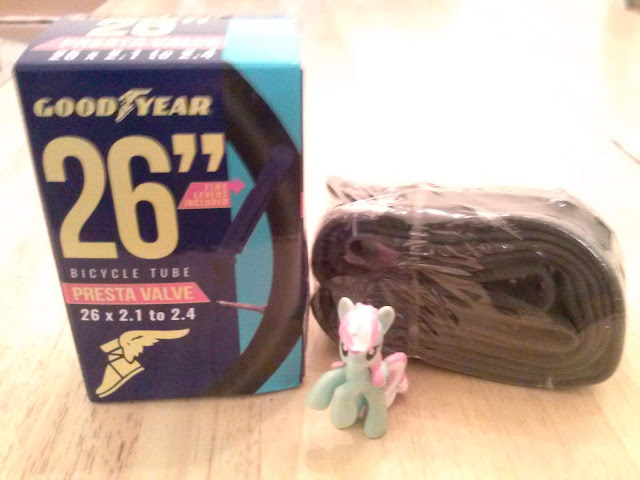
Alright! We matched the numbers to the ones on the flat tube. Only $6. Ponies who know about this type of thing will notice something we did not know about?
Did you notice the big "Presta Valve" banner? Who knew there were two different types of inflater valves? Every tire ever has had the same attachment nozzle, how were we supposed to know? Yeah this won't fit our pump so we have to go back out to the store tomorrow to get the correct "Schrader" valve.
In the meantime, we inspected the tire to see if it was okay, and found this tiny pointy thing on the inside. Here's the villain of the story.
Looks like we ran over a tiny staple. Yank! Out of the tire please! The rest of the tire looked fine.
Hmm, wonder where exactly we ran you over? We'd like to avoid your friends if we could.
Back with the new, correct, tube. Ah, good old familiar nozzle attachment.
Um, is this the right size? It looked way bigger! The numbers matched? Hope this works out okay.
Valve is in place, and the tube is crammed in the tire, I guess. It was a little bit of work to get this back around the rim, and this was the point where we were wondering how much it might have cost to just go to a shop and have some other pony do this for us.
Almost all the way back on! It was squishable and really not as hard as we thought. Still don't enjoy the thought of doing this again if we need to, but not as scary if we do.
Success! Let's get this thing back on the bike!
We forgot to take a picture of where exactly the chain went, but we did pay attention when we took the wheel off, so that was not a big deal. The bottom of the bike is plenty dirty. Something we don't normally look at.
The bolts were not cooperating with the regular wrench. We had to crush them in the pliers but they finally started to play along, ah'-ight? You gunna make me get out the pliers, you gunna get squeezed.
Air pumped back up to normal! Huzzah! The hassle of the repair is now replaced with the satisfaction that we fixed it. Still plenty of afternoon left on this Summer Saturday to test it out!


No comments:
Post a Comment